Hello there, cupcake enthusiasts! If you’re passionate about baking and decorating, you might already know the joy of displaying your creations with style. One pleasant and often practical option is using a cardboard cupcake stand. If you’re looking for something elegant, consider browsing our guide to elegant cupcake stands. Let’s take a delightful journey to explore these charming cupcake display options.
Why Consider a Cardboard Cupcake Stand?
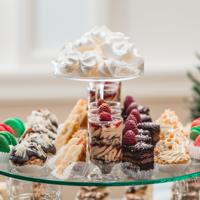
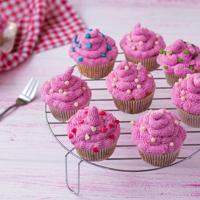
Cardboard cupcake stands might not be the fanciest choice out there, but they bring their own unique blend of benefits. They are often more affordable than their glass or metal counterparts, which makes them a great choice for those on a budget or hosting a one-time event. Plus, they come in a wide range of designs and patterns—perfect for adding a touch of personality to your presentation. For example, you might consider square cupcake stands for a more modern look.
Moreover, these stands are usually quite lightweight. This means they’re easy to carry and set up, a feature that might come in handy at parties or events. Most cardboard stands are also collapsible, which ensures they take up minimal storage space post-celebration.
The Design and Variety
One remarkable aspect of cardboard cupcake stands is the plethora of designs available. You can find them in sweet pastel colors for baby showers, vibrant tones for kids’ birthday parties, or elegant golds and silvers for more formal events. Many stands come with customizable options, allowing you to paint, embellish, or wrap them to suit your particular theme. For more cupcake stand decoration ideas check out our dedicated page.
For example, a tiered cardboard stand decorated with flowers could be perfect for a garden party. On the other hand, a sleek black-and-white striped version may be the right fit for a modern wedding celebration. You can find more cupcake stand ideas here.
Building Your Own Cardboard Cupcake Stand
Feeling creative? Consider building your own cardboard cupcake stand. This can be a fun and satisfying project that allows you to match the stand precisely to the event’s theme or your personal taste. Once built, you can learn how to decorate it beautifully with decorating tips and ideas.
Basic DIY Approach
-
Gather Materials: You’ll need cardboard sheets, scissors, a ruler, and some glue. Decorative paper or paint can add a final touch of style.
-
Cut the Tiers: Trace round shapes in varying sizes on the cardboard and cut them out. These will form the levels of the stand. For a more elaborate design, consider building a three-tier cupcake stand.
-
Create the Support: Cut cardboard tubes to the desired height and reinforce them to serve as the levels’ support.
-
Assemble: Glue the tubes upright between the tiers, starting from the base, and let it dry.
-
Decorate: Use paint, washi tape, or decorative paper to match your theme. For more ideas, check out our Cupcake Decorating page.
Building your own stand can be quite rewarding, giving you a tangible way to express your creativity. For instructions on how to build a wooden cupcake stand.
Sustainability Matters
When considering cardboard cupcake stands, it’s thoughtful to be aware of the environmental aspect. Cardboard is often recyclable, making these stands a more environmentally friendly option than some plastic alternatives. After your event, you might simply recycle the stand along with other cardboard—just ensure no non-recyclable decorations are attached.
References and Inspirations
If you’re looking for inspiration or more guidance, many blogs and online platforms like Pinterest and YouTube offer tutorials on creating beautiful cupcake stands from cardboard. Some users share novel design patterns and tips, providing a helpful resource for beginners and seasoned crafters alike.
A noteworthy blog post that caught my eye involved someone using hardcover storybooks to decorate each tier of the cardboard stand for a themed birthday party. It was not only creative but also personalized.
Final Thoughts
Exploring cardboard cupcake stands can be an enjoyable experience and a wonderful way to showcase your baked delights. They offer a budget-friendly, customizable, and sustainable option for your cupcake display needs. For smaller treats, consider using mini cupcake stands.
I hope this discussion has provided you with inspiration and insight into the humble cardboard cupcake stand. Enjoy baking, decorating, and displaying your cupcakes with joy. If you’re looking for the perfect stand, check out our guide on exploring cupcake stands. Happy baking!